Technical support

Go to a theme

Drivers & Downloads

Tutorial videos

FAQ

Old product

Guide & Manuals

Quickstart_badgy - 12.6 Mo - PDF

Drivers & Firmware Haut de page

To install a print driver, you must have administrator rights on your computer.

A print driver is software that enables the computer to communicate with your printer. Without a print driver, the printer that you connect to the computer will not work properly.

Windows Printer Driver compatible with Windows 7 (32/64b) & higher.

To install a print driver, you must have administrator rights on your computer.

A print driver is software that enables the computer to communicate with your printer. Without a print driver, the printer that you connect to the computer will not work properly.

Mac OS Printer Driver compatible with Mac OS X version 10.12 to 11

A firmware is internal printer software that enables its electronic and mechanical features to function. Evolis continually develops new updates in order to add new features or provide bug fixes. (See FAQ “How to update my printer”).

Evolis Badge Studio Haut de page

Support & Service Haut de page

This document describes warranty conditions and limitations for Badgy100 & Badgy200 card printers.

Printer Haut de page

  1. Once you have unpacked the printer and its accessories, connect the power cable to the power supply unit, then plug the power cable connector into the printer.
  2. Plug the power cable into a grounded power socket.
  3. The printer is powered on.
  4. The pushbutton lights up, indicating that the printer is operational.
  5. Take the Badgy CD-Rom and insert it in your computer.
  6. Caution: You must install the printer driver before you install the ‘Badge Studio’ software.
  7. Click ‘1. Install the driver‘ and select your installation language.
  8. Caution: At this stage, the printer must not be connected to the USB port.
  9. A program will guide you through the entire installation process for the driver.
  10. Wait until the printer driver has been installed before connecting the printer to the computer with the USB cable.
  11. Once the driver has been installed, connect the USB cable to the computer and the printer.
  12. In the CD-Rom menu, click ‘2. Install Evolis Badge Studio
  13. A program will guide you through the entire installation process for the software.
  14. Once the installation process is complete, the software will be launched automatically.
  15. Open the printer cover and insert the ribbon.
  16. Close the cover and press until a click is heard.
  17. Open the card feeder, insert the cards (print side facing up), then close the feeder.
  18. In Badge Studio, open the menu ‘File > Print Settings‘ select your Badgy printer and click ‘OK
  19. Print by clicking the button in the software interface.
  20. You can find your printed cards in the output hopper.
  1. Open the printer cover.
  2. Remove the ribbon from the printer.
  3. Close the cover and check it has clicked shut.
  4. Open the card feeder and remove the cards.
  5. Take a new T-shaped cleaning card supplied by Evolis and open the sachet.
  6. Press the pushbutton on the printer control panel twice.
  7. When the “card/ribbon” LED on the control panel flashes, insert the “T” card into the feeder.
  8. Cleaning starts.
  9. Remove the “T” card.
  10. Place the cards back into the feeder, then replace the ribbon
  1. Unplug the printer from the power supply.
  2. The pushbutton light goes out.
  3. Open the printer cover.
  4. Take an Evolis cleaning pen and remove the cap.
  5. Gently rub the pen along the print head from left to right for a few seconds.
  6. Put the cap back on the pen.
  7. Close the cover.
  8. Wait two minutes for the cleaning agent to evaporate completely before using the printer.
  9. Reconnect the printer to the power supply to switch it on.
  10. The pushbutton lights up and the printer is ready to use.

Evolis Badge Studio Haut de page

You don’t have this version of Badge Studio software? Check out the How to videos of the previous version of the software by clicking here.

You don’t have this version of Badge Studio software? Check out the How to videos of the previous version of the software by clicking here.

You don’t have this version of Badge Studio software? Check out the How to videos of the previous version of the software by clicking here.

Differences between the solutions Haut de page

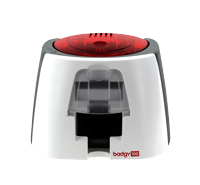
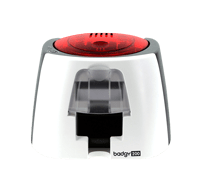
Hardware difference is the logo on the bottom-right of the printer: red-colored for Badgy 100 and black-colored for Badgy 200.

Technical specifications are also different:

Badgy 100

  • Print area: Printing close to edge with a margin of 1,35mm
  • Print speed:
    • YMCKO color: 45s per card (80 cards an hour)
    • Monochrome (K): 16s per card (180 cards an hour)
  • Badge customization software: Badge Studio or Badge Studio+ with a chargeable voucher

Badgy200

  • Print area: Edge-to-edge printing
  • Print speed:
    • YMCKO color: 38s per card (95 cards an hour)
    • Monochrome (K): 11s per card (240 cards an hour)
  • Badge customization software: Badge Studio+ (free of charge)

Evolis Badge Studio Haut de page

Since March 2020, a new version of Badge Studio is available (v 2.0.0).
You can easily recognize the version currently installed from the application icon on your workstation:

The new version Badge Studio v2
You are still with the v1 version.

Please note that you can update your application for free by downloading the new version via this link.
If you have any questions about Badge Studio v1, you can refer to this document.

Badge Studio is a simple and user-friendly software used to design and print badges and all types of ID cards.

Badge Studio Standard version

  • All-in-one installation
  • Card templates (internal and access to the online template library)
  • Compatible with Mac and Windows
  • Locking (without password)
  • Internal database (limited to 20 registrations)

Badge Studio Plus Edition

  • All-in-one installation
  • Card templates (internal and access to the online template library)
  • Compatible with Mac and Windows
  • Locking (with password)
  • Internal database
  • Import from MS Excel + Import Wizard (as well as Access, .csv, and .txt)
  • Creation of single-sided and double-sided cards (personalization and assistant)

Yes, the new version of Badge Studio is compatible with the documents generated with the previous Badge Studio version.
From the Home Page, click on File> Open a document.
Browse a document that was created with a previous version of Badge Studio software (.card file).
Once the document is opened in Badge Studio, you may edit it and save it as wished.

From the USB drive provided by Evolis, double-click on Setup_BadgySoftware.exe or Setup_BadgySoftware.pkg to launch the installation. Follow the instructions of the wizard.
You may also download the file from www.badgy.com and launch the installation on your computer.
The setup will install the driver and the software. For this reason, it is necessary to wait for the full installation of the setup before plugging in the USB cable on your computer.

Badge Studio may be installed on as many computers as desired (Windows® 7 or later version/Mac OS 10.12 or later version).
A license activation code for the PLUS edition can only be used on one computer at a time (for more details, refer to FAQ How Do I Upgrade to PLUS Edition?)
Printing will be possible as long as the Badgy printer is plugged-in to the adequate computer via USB.

Yes, you can open up to 5 sessions of Badge Studio at the same time.
If you try to open a 6th session of the software, an error message is displayed.

A record corresponds to a line in the database.
To print cards, you need to select lines in the database.
Cards can be printed either in batch or one by one.
With Badge Studio STANDARD edition, the maximum number of records in the database is 20.
With Badge Studio PLUS edition, there is not limit of records.

Badge Studio supports an internal database as well as the import of external databases (only with Badge Studio PLUS ) to feed the internal one and manage records.
The accepted external database formats are the following: Excel/CSV/TXT/Access.

You may edit the document design of your card, or edit directly the values of the database table (double-click on a cell to edit it).

After you have created the external database, click on File>Import Data and follow the instructions of the wizard.
The wizard enables to match the columns contained in your external database with the graphical objects of the open Badge Studio document and to define one or several reference columns.
Defining one or more reference columns enables to identify a unique person or object in your database, in order to avoid duplicates.
When duplicates are found in the database, Badge Studio offers the possibility to manage them.
If you want to import more than ten (10) columns in the internal database: match 10 columns of the database with 10 graphical objects of the document.
For the remaining columns, do not forget to select them in the advanced properties of the same window.
For more details, you may watch the dedicated How-to video.

You can add images to your external database. They are inserted them through a link in Excel or through an OLE object in Access.
The images are then imported and displayed in your internal database.

During the import, when Badge Studio detects duplicates in the imported database, the user has the following choice:
– ignore the duplicates (they are not imported)
– merge the duplicated lines
– keep the duplicated lines

Customization is made through the adding of objects from the top bar, and changing settings from the Properties pane displayed on the right.
Changing the background of the document is also possible.
With Badge Studio PLUS edition, you may edit the front side and the back side of the card.
For more details, you may watch the dedicated How-to video.

From the objects bar displayed at the top of the screen, you can browse the image on your computer or take a picture with the web camera.
The image/picture is then added to the document design.
Signatures made with an Evolis signature pad may be inserted in Badge Studio as a TIFF, PNG, BMP, JPEG or GIF image.

From the Home page, click on Badge Creation to display the corresponding wizard. Select New Document>White Card.
The document displayed is empty and the database is ready to be created. Click on the icons in the top bar to create objects on the card and feed the database.
For more details, you may watch the dedicated How-to video.

From the top bar, click on the barcode icon and choose either 1D barcode or 2D barcode.
It is then possible to edit the advanced parameters of the barcode from the Properties pane displayed on the right.

From the document design, click on the lock icon. Your whole design is now locked: editing the objects is no more possible, but can still edit the database values.

From the Badge Creation wizard that is displayed at the launch of the software, click on Get More Templates to have access to Badgy card template library or click here.
Then you can select the badge templates by applications, sectors and colors.

You can select between 1 to 25 records to print in a batch.
Select the wished number of rows by:
– selecting the cells one by one and holding down the CTRL key,
– selecting the first line, pressing and holding the SHIFT key, and selecting the last line
– ticking the checkbox at the top-left of the table to select all lines of the table

Then click on Print. The wizard will guide you in the process:

Evolis Badge Studio Wizard assistant installation

Badge Studio allows printing dual-sided cards using a simplex printer (Badgy100 and Badgy200).
This feature is available with the PLUS edition of Badge Studio.
From the Printing window, click on Print and follow the wizard to help you in the procedure.

Evolis Badge Studio Printing Wizard assistant

1. The wizard prints all front sides of cards
2. Then user is asked to flip the cards and insert them in the printer
3. The back sides of cards are printed

For more details, you may watch the dedicated How-to video.

There are two ways to upgrade to the PLUS edition.
In the first case, you own a Badgy200: connecting the printer to your computer and launching the software automatically upgrades to the PLUS edition.
In the second case, you own a Badgy100, you have a license activation code and an Internet connection.
Check that your license has been activated by clicking on File>Badge Studio License: the edition version is displayed.

You can use the license for PLUS edition that you had on a previous Badge Studio.
It is compatible with your latest version of the software.

If you install the latest version of Badge Studio:
– either the license is automatically updated on your software with no user action (with 2.0.1 or when the upgrade is on the same computer)
– or you need to enter the code manually, through File>Badge Studio license (in case the upgrade is on another computer, the reinstallation is complete, or with version 2.0.0)
In some specific and other cases where the license may be not be compatible, please contact the Support team.

Starting from version 2.0.1 of Badge Studio, the software no longer ensures compatibility with Badgy1 printer.

Vcard allows you to encode the information displayed on a business card in a QR code. When scanning the QR code with a QR code reader application, a person can create a new contact in their phone, locate the company on a map application, call the registered phone number, send an email to the registered email address, copy or share the information.

1. Click on the Add Vcard icon.

A QR code is displayed on the card design. The properties panel is displayed to the right of the card design area.

2. Register the information in the Vcard properties section.

a. You can link each field to an existing column of the database.

      • Click on the arrow next to a Choose Column field
      • Select a column of your database

b. You can manually type the information directly in the field.

Typed information is displayed for all rows of the database.

The registered information for the selected row is displayed below:

Click on the vCard QR code. The properties panel is displayed to the right of the card design area.

Badgy Vcard Format

Click Clear Fields to empty all fields of the registered information.

  1. If not already selected, select the vCard QR code on the card design. The properties panel is displayed to the right of the card design area.
  2. Modify the information directly in the database

The information is updated on the card design and the vCard field display.

  • The foreground (default color is black) must be a darker color than the background (default color is white).
  • The combination yellow foreground and white background makes the QR code unreadable.
  • Make sure there is a good contrast between the foreground and the background of the QR code
  • The minimum size for a good readability is 1.5×1.5cm.
  • Add a frame the same color as the QR code background of at least 1/4 pt.

Cards Haut de page

PVC, composite PVC and PET cards can be used with Badgy.

Badgy supports ISO CR80 – ISO 7810 norm cards (credit card size) and cards thicknesses from 0.50mm (20 mil) to 0.76 mm (30 mil).

Please note that printing quality may vary depending of the card manufacturer.

The Badgy consumables linked to the printer was specifically developed and optimized to guarantee the highest quality of printing.

Using these consumables increases the life span of your badges and of your Badgy printer.

Make sure that the cards are not sticking together, and that they meet all Badgy compatibility requirements (the Badgy consumables linked to the printer were specifically developed and optimized to guarantee the highest quality of printing).If the card cannot be fed or loaded correctly, the following points can be checked, one by one:

  • Printer cleaning (use the advanced procedure)
  • The card dimension and compatibility

If the problem persists after checking these points, please contact your Evolis reseller/distributor or contact us.

Due to the presence of INFRARED sensors which are used for the cards synchronization, the transparent or translucent card cannot be used correctly with the Badgy printers.

For more information or special request, please contact your Badgy reseller/distributor.

YES. It’s entirely possible to use pre-printed cards and personalize them with black text using Badgy.

It’s not possible to print with a Badgy ribbon on a card that has already been printed with this ribbon.

The ink can be applied only once on each side of the card.

In fact, printing will optimize colors only on a white background.

Badgy printers are essentially designed to print on PVC plastic cards in CR80 format. This format corresponds to that of a credit card and the dimensions are 85.6 x 54 mm.
For some cards that have a rather short lifespan, such as visitor cards or gift cards, it is possible to print on paper cards, made of cellulose fiber, available in the Badgy catalog. These cards can only be printed with the BlackFlex CBGR0500F ribbon.

Warranty Haut de page

The warranty period for the Badgy printer and print head is of 2 years, with unlimited number of prints. These are detailed in a paper document that is provided with Badgy printers, and are also displayed on the second screen of the driver setup wizard.

If generic ribbons are used, the warranty will be null and void. No support request will be provided

Extended warranties of 1 or 2 years are available at your Badgy reseller.

Drivers & Firmware Haut de page

A driver is a software used to communicate with the printer through the computer in order to manage ribbon choice, print intensity, contrast, insertion modes, etc…

The driver also broadcasts internal notification and information from the printer. The driver must be installed before the first use of the printer and must be compatible with the target operating system.

Administrator rights are required for its installation.

You can directly identify the system versions installed (driver, setup, etc.):

  1. From the Badgy Print Center, double-click on the printer name to access its Properties.
  2. Click on System details, then System details.
Badgy - System info panel - Checking the driver version

Badgy Premium Suite driver is available from the USB stick shipped with the printer.

You can also download it from the BADGY website.

The driver is available for the following platforms:

  • Windows 7 (32/64-bit)
  • Windows 8 (32/64-bit)
  • Windows 10 (32/64-bit)
  • MAC OS 10.12 to 11 (for older versions, please contact your reseller)
  • Linux (Main distribution – Debian, Redhat, …)

Before installing a Badgy driver, the computer user must have administrator rights, otherwise it will not be possible to complete the installation.

The printer must not be connected to the USB port until the print driver has been completely installed.

  1. Browse and launch the driver installation file:
    From the Support section on Badgy website: Go to the printer name>Drivers and Firmwares
    Download Windows Badgy Premium Suite setup file

From the USB stick provided with the printer: The all-in-one installation file is called Setup_BadgySoftware.exe

It will install the driver as well as Badge Studio software

2. The driver installation program will guide you through the whole installation process.

3. Wait until the printer driver has been fully installed before connecting the printer to the computer with the USB cable.

Before installing a Badgy driver, please check that your computer has administrator rights. Otherwise, it will not be possible to complete the installation.

  1. Browse and launch the driver installation file:
    From the Support section on Badgy website: Go to the printer name>Drivers and Firmwares
    Download Macintosh Badgy Card Printer setup file and unzip it.
    From the USB stick provided with the printer: The all-in-one installation file is called BadgeStudio2.0.0.pkg
    It will install the driver as well as Badge Studio software
  2. Run the Mac driver and follow the installer information
  3. Connect the Badgy printer to a free USB port on your MAC computer
  4. Switch on the Badgy printer.
  5. Click System Preferences in the Apple menu.
Where to find the system preferences - Apple menu

7. Click Printer & Scanners in the System Preferences menu.

8. Click the “+” button to add a new printer.

Add a new printer to the system preferences - Apple

9. Select”EVOLIS Badgy” in the printer list.

10. In the Use section, click the Select Software option.

11. In the Printer Software list, select the Evolis Badgy driver in your language of choice.

12. Confirm by clicking OK and Add.

Badgy Premium Suite® brings together several software components with the goal to manage card personalization from end to end, while making this process simple and user friendly.

The Badgy Print Center enables to configure the system, manage printers and monitor all printing jobs.

It provides real-time monitoring of Badgy printers. It is also in relation with the Printer Manager for the notifications.

The combination of the Printer Manager and the Print Center frees the user from configuration tasks since this process is automated and is specific to the type of ribbon loaded in the printer.

The Badgy Print center can manage the following Badgy printers:

  • Badgy100
  • Badgy200

It gathers Evolis components used to detect the printer, manage the communication and notifications. It is also the graphic interface to set and display the information related to each detected printer.

The print center is also in relation with the printer manager for the notifications.

Visual of the print center of a Badgy printer

In relation with the print center components, it’s a graphic interface that displays the notifications (printer status, cleaning alerts…)

The Badgy Printer Manager is a two-way communication tool that links your computer to the Badgy printer.

It simply gives you instant notification on your Badgy’s status thanks to:

A small icon located in the lower part of your screen, in the notification area, that switches color according to the current status of your printer (printer connected or disconnected, specific action to be taken, etc.).

Visual of the notification icon concerning the status of the printer
Visual of the Badgy printer information system pop-up window

An information system of animated pop-up windows that tells you what action is required to be taken for printing (change ribbon, clean the printer, cover open, etc…).

The options are as follows:

  • First button (yellow): to access local help
  • Second button (green): cancels the current print job
  • Third button (red): resumes the print job


The Printer Manager icon switches to different colors according to the status of your Badgy printer.

  • Green icon: the printer is ready
  • Grey icon: the printer is not connected (power supply or USB cable is disconnected)
  • Orange icon:An action is required to enable printing. The printing job will automatically resume after the action is implemented. You may access the local help through a click on . In some cases, you may also cancel the printing job that is in progress by clicking
  • Red icon: an error has occurred in the Badgy Printer, and some action is required to be taken. To resume printing, click on the green button. To access the local help, click on the orange. In some cases, you may also cancel the printing job that is in progress by clicking on the red button.

A firmware is a resident software, embedded in a flash memory on the main board and that operates as a layer between the hardware and the software. It is mainly used to directly manage the resource and is provided by Evolis for exclusive use with its printers.

A regular update is strongly advised to receive all the latest improvements:

  • Enhanced performances
  • New command(s) and feature(s)
  • Bug fixing.

Each main board has its own firmware, which can be downloaded from this website.

BADGY firmware is downloadable from the BADGY website.


  1. You can directly identify the firmware version of your Badgy printer.

There are two ways:

Option n°1

From Badgy Print Center, double-click on the printer name to access its Properties and click on System details>Printer details:

Badgy firmware identification via the Print Center

Option n°2

Printing the technical test card from the Badgy print center: double-click on the printer name to access its Properties>System details>Technical test card:

Badgy firmware identification via the print center and technical test cards
  1. To perform an upgrade of the firmware printer, you need to run the wizard tool.

There are two ways:

Option n°1

From the Menu Tools, select Printer firmware update wizard

Firmware Update Wizard for Badgy printers

Option n°2

From Badgy Print Center, double-click on the printer name to access its Properties>Maintenance>Firmware Update

Click Launch the update wizard

Badgy Firmware Update Wizard in the Print Center

Before installing a Badgy driver, the computer user must have administrator rights, otherwise it will not be possible to complete the installation.

This procedure requires an Internet connection to download the latest updates from the Evolis servers.

To update the driver and firmware:

  1. Open the Badgy Print Center (see shortcuts on Windows desktop).
  2. Click Tools then select Check for Updates Wizard.
  3. Follow the instructions on the update wizard to update the print driver, then the printer firmware.

Before installing a Badgy driver, please check that your computer has administrator rights. Otherwise, it will not be possible to complete the installation.

This procedure requires an Internet connection to download the latest updates from the Evolis servers.

PRINT DRIVER UPDATE : please refer to FAQ How to Install the Driver on a Badgy Printer in MACINTOSH?

FIRMWARE

Option #1: your version of MAC OS is under 10.15

  1. Download the firmware file to your hard disk from the Download section of the Badgy website.
  2. Connect your printer to your computer and switch it on.
  3. Click System Preferences in the Apple menu.
Where to find the system preferences - Apple menu
  1. Click Printers & Scanners in the System Preferences menu.
  2. Select the Evolis Badgy printer and click Options & Supplies.
  3. Click the Utility tab, then the Open Printer Utility button.
  4. Click the Upgrade button.
  5. Click the file downloaded to your hard drive, then click Open.
  6. The on-off switch on the control panel should flash during the firmware update (do not switch off the printer)

Cleaning Haut de page

In order to get the most of your printer, regular cleaning of the different printer parts (rollers and print head) is recommended.

Do not hesitate to clean the printer in the event of any printing problems, after a long period of inactivity or when a pop-up informs about the need for cleaning. The recommended cleaning cycle is once a year.

However, we do recommend more regular cleaning if:

  • your printer is located in a dusty place
  • you use it intensively.

The servicing accessory is the impregnated T-shaped card.

The T-shaped cards and Evolis cleaning pens are available at your Badgy reseller

Follow the procedure below to proceed with cleaning:

  1. Open the printer cover
  2. Remove the ribbon
  3. Close the cover and press until a click is heard
  4. Remove any cards present in the feeder
  5. Double-click the control button before inserting the T-shaped cleaning card
  6. Take the T-shaped cleaning card and insert it in the feeder. Cleaning starts.
  7. Remove the T-shaped card

Printer cleaning may also be carried out from the Badgy Print Center:

  •  through printer Properties> Cleaning>Proceed with cleaning
Visual of the Badgy print center for cleaning the printer
  • or through the menu Tools>Printer Cleaning Wizard

The T-shaped card must be used immediately after the bag is opened. The T-shaped card is of single use. Please use a new one each time you clean.

Please refer to the printer User Guide for more details.

Please note that the print head is a fragile component of your printer.

It is recommended to perform a cleaning cycle if you notice poor-quality printing or after a long period of inactivity.

Use the cleaning pen from the Evolis High Trust® brand.

The cleaning pen can be used up to 8 times to clean the print head.

It is recommended to:

  1. Unplug the printer from its power supply before cleaning the print head.
  2. Follow the cleaning cycles scrupulously.
  3. Avoid any contact between the print head and any metal or sharp objects.
  4. Avoid touching the print head directly with your fingers, as this could affect print quality or permanently damage the print head.

To clean the print head, follow the procedure below:

  1. Remove the cover from the cleaning pen.
  2. Unplug the power supply, open the cover, and find the print head.
  3. Gently rub the pen from left to right along the print head as indicated for a few seconds.
  4. Close the cover. Reconnect the printer.
  5. After cleaning, please wait 2 minutes before using your printer again.
Cleaning the Badgy print head with the cleaning pen

You must also protect the print head and its components from any discharge of static electricity.

Please refer to the printer’s User Guide for more details.

Port/Connection Haut de page

Badgy printer uses a USB port.

Badgy printer is compatible from USB 1.0 to USB 3.0.

In case of driver installation issue; please contact your Badgy reseller/distributor or contact us.

Ribbons Haut de page

Badgy printers use a printing ribbon (supplied) which consists of series of 5 panels. To print a specific color on the card, the printer successively superimposes the first 3 layers (yellow, magenta and cyan) which together create the required shade, in photo quality. Black panels (to print text) and varnish (to protect the card) are then applied to the card.

  1. Open the printer cover.
  2. Take a new ribbon.
  3. Insert the ribbon inside the printer.
  4. Close the printer cover.
  5. The printer automatically recognizes the ribbon inserted.

Two ribbons are currently available for Badgy printers:

  • Color ribbon: 5 panels YMCKO 100 prints/roll
  • Monochrome ribbon (black): 500 prints/roll

YMCKO refers to a 5-panel ribbon. Each letter matches up to a color panel:

  • Y Yellow
  • M Magenta
  • C Cyan
  • K blacK
  • O Overlay

YES. In this case, it would be more cost effective to use a black ribbon.

Evolis original ribbons optimize your printer’s operation and avoid causing damage to it.

Ribbons from other suppliers are not compatible with your printer.

Their use is liable to damage your printer and voids the manufacturer’s warranty for the printer.

The warranty will be null and void. No support request will be entertained if generic ribbons have been used

Miscellaneous Haut de page

No, the white margins (min is 1.35mm) from the printed cards edge are normal with the Badgy100 printer. It is not possible to reduce them completely.

This margin does not exist with Badgy200 printer.

Refer to Badgy printers differences in the Miscellaneous section of the FAQ.

Please refer to the software User Guide and watch the how-to videos.

There are three ways to find the printer serial number:

  • Print the technical test card
  • Or Look at the sticker on the back of the printer
  • Or from Badgy Print Center, double-click on the printer name to access its Properties>System details:
Badgy firmware identification via the Print Center

YES. Badgy100 and Badgy200 are equipped with a single-side printing module. To create doublesided cards, simply print your cards on one side and then reinsert them in the card feeder to print on the other side.

The Evolis Badge Studio® software in Plus version supplied with Badgy200 also features a wizard for manually printing series of double-sided cards.

The memory capacity of the main board is 16 Mb of Random Access Memory.

NO. Badgy does not have any encoder (magnetic strip, smartcard with or without contact). However, you can personalize pre-encoded cards with black texts using Badgy.

YES. It’s very simple: use the Evolis Badge Studio® software to insert your barcode or QR code in your card design and start printing!

Badgy solutions come with a 2-year warranty. In case of failure, contact our technical support team here. You can also extend the warranty for your solution (up to 4 years).{

For more details, please visit our extended warranty page.

Troubleshooting Haut de page

This may happen if some dust is present on the card surface or in the printer. The print head and the ribbon that are in contact with the card those parts have to be dust free. Make sure your cards and the ribbon are stored in a dust free environment.

Do not touch the printable surface of the cards as this could affect the print quality. You can also clean the printer and print head to improve the print quality.

If the colors on the printed card are too dark or too fade, the following points have to be checked:

  • Are the contrast/intensity values too high or too low?
Graphic settings in Badgy printing properties
  • Upgrade the firmware to at least 2126 version
  • Is the power supply an Evolis one?
  • Make sure that the Evolis power supply is not faulty. The power supply displays a green light when it operates properly.

If the issue persists even after checking these points, please contact your Evolis reseller/distributor or contact us.

If no LED light is on, including the power button, please check the following points:

  1. The power supply must be connected to a live electrical wall socket.
  2. You must use the power supply provided with your Badgy printer.
  3. Is the power supply faulty? The power supply displays a green light when it operates properly.
  4. The power supply must be suitably connected to the printer.

If you still have the same glitch even after following these points, please contact your Badgy reseller/distributor or contact us.

The User Guide provides you a clear explanation of every LED on the control panel.

This guide is available on the Badgy USB stick shipped with the printer, or, it can also be downloaded from Badgy website.

We recommend that you print a technical test card to ensure that your printer is working properly.

This card shows various technical information concerning the printer (serial number, firmware, print head, etc.).

There are two different procedures to print a technical test card:

Option n°1: from the printer

  1. Wait for any current printing jobs to finish.
  2. Check that there is a ribbon and a card in the printer.
  3. Press the control button for four seconds. All warning lights go out.
  4. Press and hold down the control button again. The control button light is now on.
  5. Release the control button once the light flashes.
  6. The technical test card is printed and ejected through the output hopper.

Option n°2: from Badgy Print Center

  1. Open Badgy Print Center
  2. Double-click on your printer or right-click on Properties and go to System details>Testing cards

The printer can use different LEDs to give information about the state of the printer.

Depending on the LED status, some operations may have to be performed:

Meaning of the Badgy printer LEDs
  • Cards and ribbon LED is ON. Check the ribbon printing remaining capacity and the presence of cards in the printer feeder.
  • Printer LED is ON. Put the ribbon in correct position. If cards are stuck in the printing module, make sure to remove them.
  • No LED is ON. Check if the power supply is an Evolis one and that it is correctly plugged to printer.
  • If the issue persists even after checking these points, please contact your Evolis reseller/distributor or contact us

The ribbon set in the driver by default is YMCKO.

On MACINTOSH, if you are using another ribbon, you need to select the adequate ribbon type to allow printing start.

There are two options :

  • Option n°1: The software you are using to print allows direct access to the driver settings
  • Option n°2: The software you are using to print does not allow direct access to the driver settings

To set the ribbon, please follow the instructions:

Option n°1: The software you are using to print allows direct access to the driver settings:

Step 1: Go to Print>Show details. Then select Printer Features.

Badgy interface for printers function

In Feature Sets>General>Ribbon Type, you can change the ribbon type in the drop-down menu:

Badgy interface to choose the type of ribbon

Step 2: To save the driver settings, go to Presets>Default Settings and Save Current Setting as Preset

You will be able to use the Last Used Settings to print your future jobs.

Option #2: The software you are using to print does not allow direct access to the driver settings.

You can access the driver through a webpage interface.

Please follow the procedure below:

Step 1: Open a webpage and type in the following address: https://localhost:631/admin

Badgy Interface web disabled

Step 2: Activate CUPS web interface: go to Finder>Applications>Utilities>Terminal

Badgy Web cups interface

In the interface of the terminal displayed, enter cupsctl WebInterface=yes and click on Enter

Badgy web cups interface terminal

Step 3: Go to Printers and click on the Badgy printer:

Badgy web cups interface terminal printers

Step 4: In the Administration menu, select Set default options:

Badgy web cups interface terminal general option

Step 5: In General, select the adequate type of ribbon:

Badgy web cups interface terminal general ribbon type

White lines on the printed cards mean that the print head is unable to heat the ribbon in this zone: the ink cannot be diffused/applied correctly onto the card surface.

Printing issue with Badgy - White lines

White line(s) on printed cards may happen for different reasons.

Check the following points:

  • Clean the printer (click here) and especially the print head, as this issue may arise from a dirty or faulty print head
  • Check that there are no wrinkles on the ribbon surface
  • Ensure the printer/consumable environment storing is free of dust. Blank cards dropped on the floor are supposed to be trashed to prevent printing issue and print head failure

If the issue remains even after checking these points, please contact your Badgy reseller/distributor or contact us.

To access explanations in FAQ section, please click the link below:

  • Badgy 100
  • Badgy 200

Les tâches, empreintes de doigts ou zones d’impression manquantes peuvent apparaître pour différentes raisons. Vérifiez les instructions suivantes une par une pour résoudre le problème.

Printing issue with Badgy - Fingerprints
  • Clean the printer
  • Ensure the printer/consumable environment storing is free of dust.
  • Ensure the cards surface is free of fingers print by taking cards by their edge.
  • Blank cards dropped on the floor are supposed to be trashed to prevent printing issue and print head failure.
  • If the issue persists even after checking these points, please contact your Evolis reseller/distributor or contact us.

Advices:

As part of its continuous improvement policy, Evolis is developing new driver & firmware which include new fixes and improvement. Evolis recommends updating driver & firmware to take full advantage of the latest improvements.

To access explanations in FAQ section, please click the link below:

    • Badgy 100
    • Badgy 200

A card feeding issue may happen for different reasons. Check the following instructions one by one until fixing the issue:

  • Clean the printer
  • Use Evolis Badgy plastic cards.
  • If the issue remains event after checking these points, please contact your Evolis reseller/distributor or contact us.

Advices:

As part of its continuous improvement policy, Evolis is developing new driver & firmware which include new fixes and improvement. Evolis recommends updating driver & firmware.

A ribbon cutting issue may happen for different reasons. Check the following instructions one by one until fixing the issue:

  • Update driver
  • Update firmware
  • Clean the printer
  • Make sure to use an Evolis Badgy ribbon.
  • Try with a ribbon from a different batch.
  • Make sure to use recommended Evolis Badgy plastic cards (PVC, composite PVC, laminated PVC and PET cards can be used with Badgy)
  • If the issue remains event after checking these points, please contact your Evolis reseller/distributor or contact us.

To access explanations in FAQ section, please click the links below:

Badgy100

  • Cleaning
  • Update driver/firmware

Badgy200

  • Cleaning
  • Update driver/firmware

Advice:

As part of its continuous improvement policy, Evolis is developing new driver & firmware which include new fixes and improvement. Evolis recommends updating driver & firmware to take full advantage of the latest improvements.

To fix the currently torn ribbon, use tape to put the panels back together:


Repairing a broken/ripped Badgy ribbon

Make sure you use an Badgy genuine ribbon

Update your firmware with at least 2126 firmware version

Make sure you use an Badgy genuine ribbon

Update your firmware with at least 2126 firmware version

Make sure you use an Badgy genuine ribbon

The information displayed regarding remaining capacity is not correct : this issue is related to a specific ribbon batch with no impact on printing quality.

Make sure you use an Badgy genuine ribbon

Update your firmware with at least 2126 firmware version

Badgy1 Haut de page

Discover our new Badgy solutions!

Discover our printer consumables for Badgy1 only.

Complete kit for 100 prints – Badgy (ref. VBDG205EU)

  • 100 PVC thick cards
  • Color ribbon for 100 prints
  • Cleaning kit included (cotton swab + adhesive card)

Discover our printer consumables for Badgy1 only.

Color YMCKO ribbon for 100 prints (ref. VBDG204EU)

  • Color YMCKO ribbon for 100 prints
  • Cleaning kit included (cotton swab + adhesive card)

This user guide contains essential information for the installation and use of your Badgy printer.

To install a print driver, you must have administrator rights on your computer.

A print driver is software that enables the computer to communicate with your printer. Without a print driver, the printer that you connect to the computer will not work properly.

NB: you should save the driver on your hard drive prior to installation. Then double click on the .exe file and follow the instructions.

* If a badge template has already been created with an older version of the Badgy printer driver, the badge template must also be updated in order to work with the latest version of the printer driver.

To install a print driver, you must have administrator rights on your computer.

A print driver is software that enables the computer to communicate with your printer. Without a print driver, the printer that you connect to the computer will not work properly.

*For Macos10.15, to get printer maintenance tool, please contact your reseller

A firmware is internal printer software that enables its electronic and mechanical features to function. Evolis continually develops new updates in order to add new features or provide bug fixes. (See FAQ “How to update my printer”).

Badgy1 - Firmware - 10.96 Mo - ZIP